> ## Documentation Index
> Fetch the complete documentation index at: https://docs.mudstack.com/llms.txt
> Use this file to discover all available pages before exploring further.
# Managing Files & Folders
> Move, cut, and rename in the app
## Create a File
Simply move your desired files into the [local directory](/features/sync-overview#how-local-and-cloud-interact) location.
You may also create or save files in this folder to automatically add them to the directory.
Created files *will not* go to the cloud automatically. A [version](/features/version-control) must be committed, then [pushed](/features/push) to upload to a cloud workspace.
### Locking Files
For teams that have a content pipeline with sequential handoffs, this locking system will give you a status for when a file is being worked on by someone else.
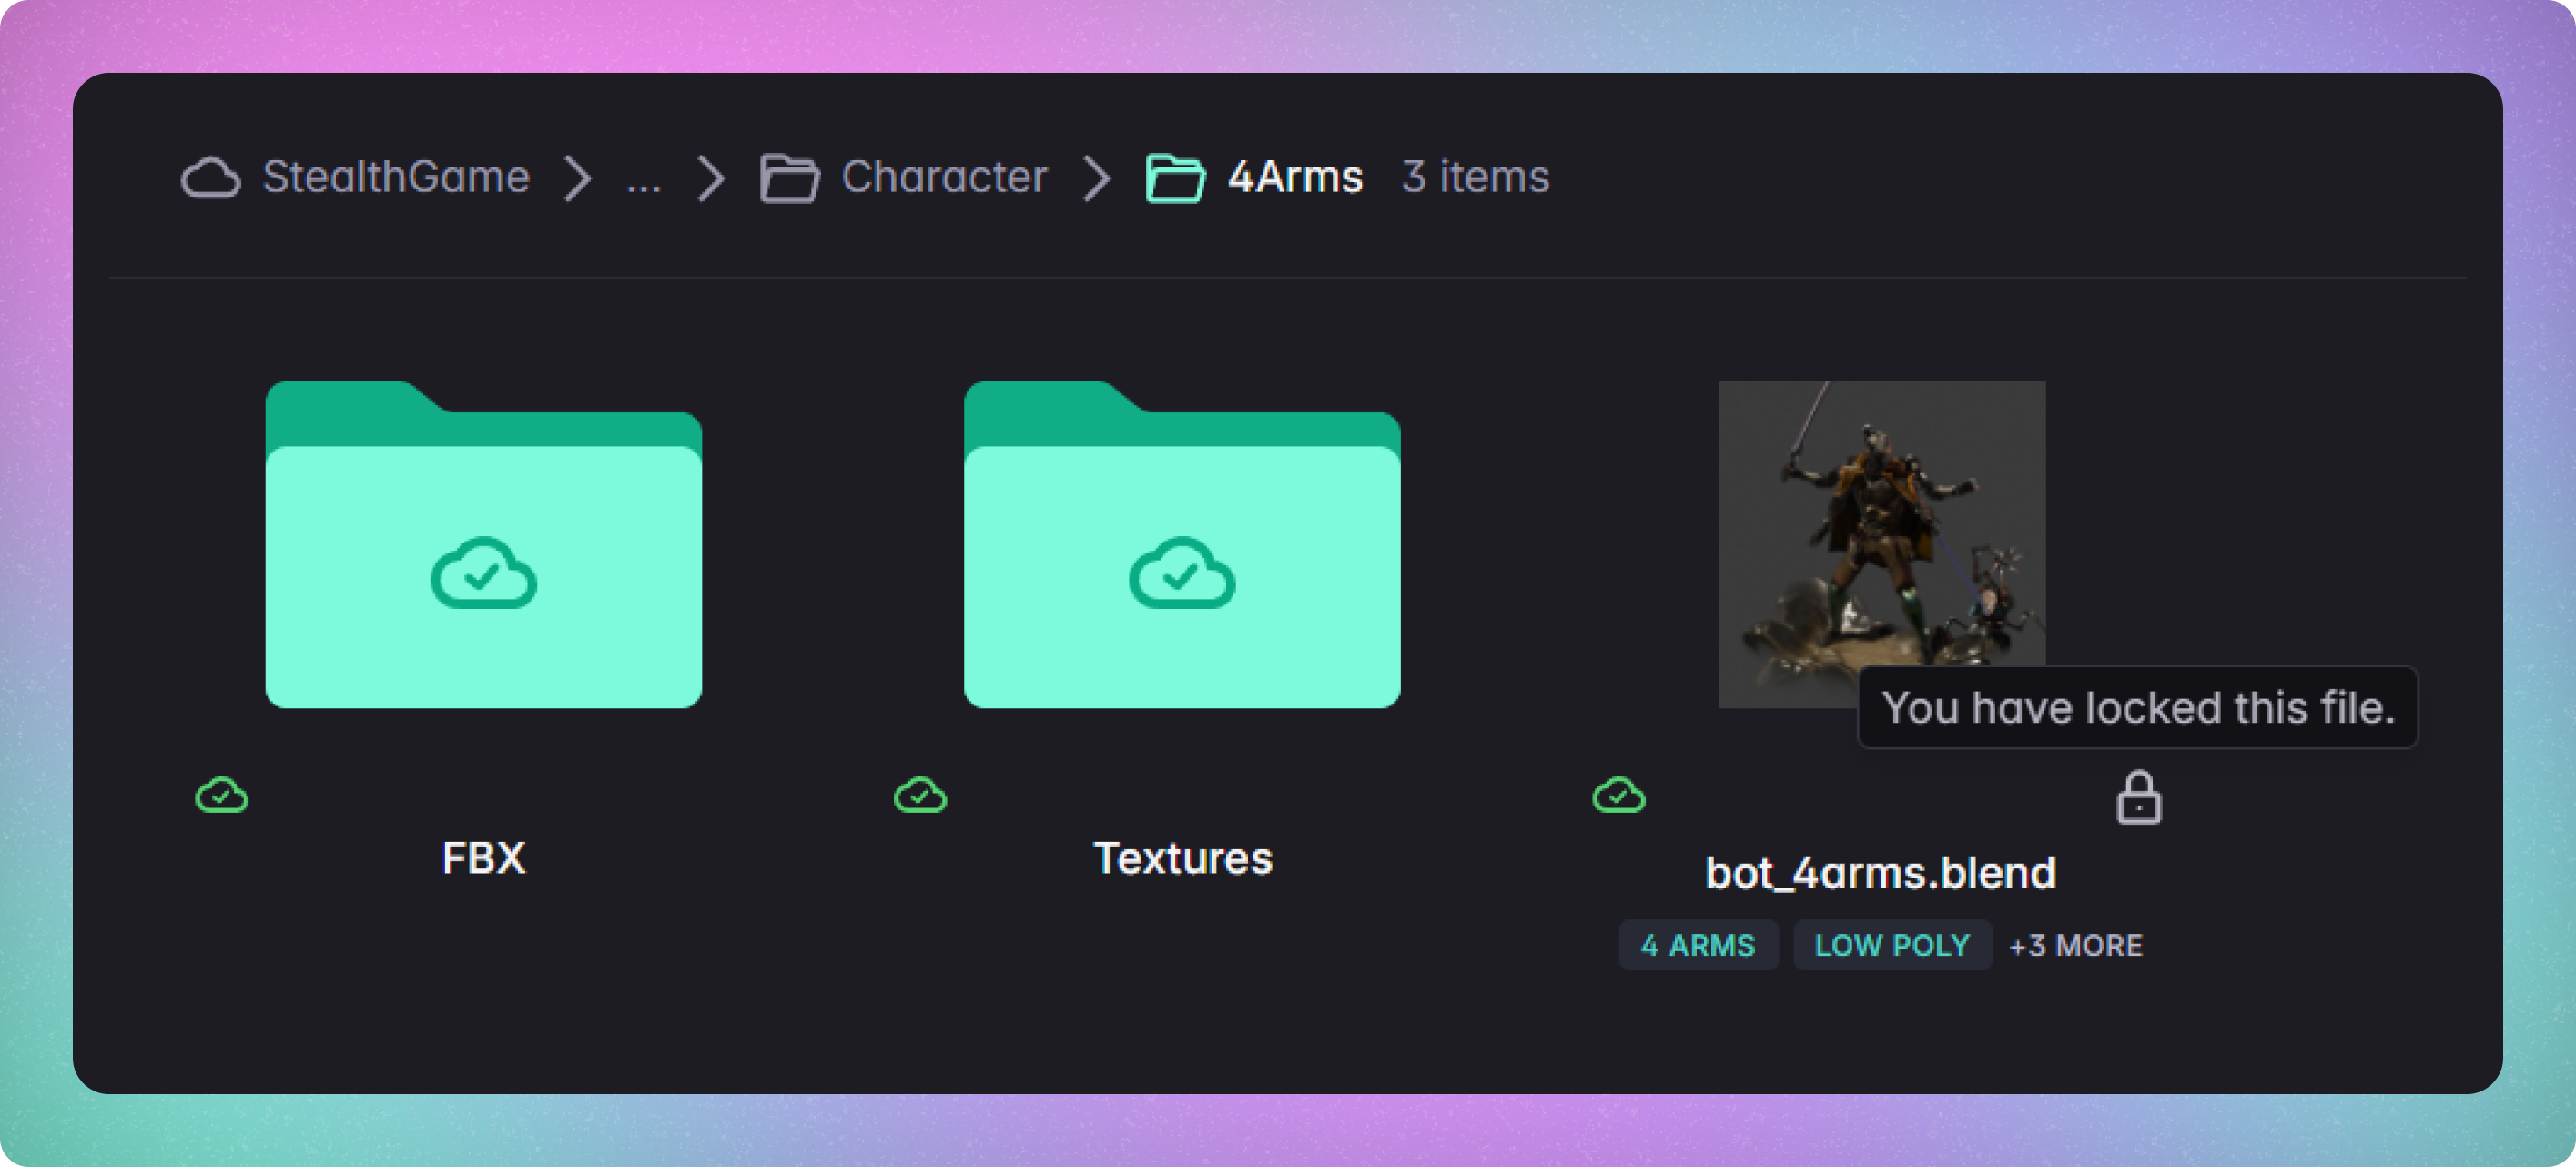 This "soft" lock only prevents pushes, not local version changes. So if you are blocked by a lock, you don't need to wait for the file to be unlocked to continue working.
Select one or more files, right click and select `Lock files` to prevent other users from pushing changes to a file until you unlock it.
Only the user that locked the file (and account admins) can unlock it.
## Create a Folder
You have several methods to create a new folder:
1. From grid or list view: Click the `Create folder here` button in the toolbar
2. In your local directory:
* For Windows: Use Explorer and choose `Create New Folder`.
* For Mac: Use Finder and select `New Folder`.
## Moving Files and Folders
To reorganize your files and folders:
1. To the Breadcrumb Bar:
Click and hold the desired file or folder.
Drag and release it onto the breadcrumb bar at the top.
2. Into a Folder in View:
Click and hold the file or folder you wish to move.
Drag and release it into the desired folder.
Using drag and drop streamlines your file and folder organization.
### Cut and Paste
`Cut`:
Select file(s).
Click the `Cut` button on the top right bar or right-click and choose `Cut`.
`Paste`:
Navigate to desired location.
Right-click in or on the folder.
Select `Paste`.
Large `cut`/`paste` actions may take some time.
## Renaming
To rename a file, select it, open its `Info` tab, and click the `Edit` button next to the file name.
You can also rename a file from your Windows Explorer or Mac Finder and Mudstack will track this change as long as it is running.
Make sure that the correct extension is placed on the end of the name.
## File Subscription
To receive file [notifications](/features/notifications#real-time-notifications) on your dashboard, click the `Subscribe` button. Click it again to unsubscribe.
Automatic subscriptions occur when you:
1. Comment, review, or take action on a file.
2. Upload a new version of a file.
3. Create a new file.
## Sync States
This "soft" lock only prevents pushes, not local version changes. So if you are blocked by a lock, you don't need to wait for the file to be unlocked to continue working.
Select one or more files, right click and select `Lock files` to prevent other users from pushing changes to a file until you unlock it.
Only the user that locked the file (and account admins) can unlock it.
## Create a Folder
You have several methods to create a new folder:
1. From grid or list view: Click the `Create folder here` button in the toolbar
2. In your local directory:
* For Windows: Use Explorer and choose `Create New Folder`.
* For Mac: Use Finder and select `New Folder`.
## Moving Files and Folders
To reorganize your files and folders:
1. To the Breadcrumb Bar:
Click and hold the desired file or folder.
Drag and release it onto the breadcrumb bar at the top.
2. Into a Folder in View:
Click and hold the file or folder you wish to move.
Drag and release it into the desired folder.
Using drag and drop streamlines your file and folder organization.
### Cut and Paste
`Cut`:
Select file(s).
Click the `Cut` button on the top right bar or right-click and choose `Cut`.
`Paste`:
Navigate to desired location.
Right-click in or on the folder.
Select `Paste`.
Large `cut`/`paste` actions may take some time.
## Renaming
To rename a file, select it, open its `Info` tab, and click the `Edit` button next to the file name.
You can also rename a file from your Windows Explorer or Mac Finder and Mudstack will track this change as long as it is running.
Make sure that the correct extension is placed on the end of the name.
## File Subscription
To receive file [notifications](/features/notifications#real-time-notifications) on your dashboard, click the `Subscribe` button. Click it again to unsubscribe.
Automatic subscriptions occur when you:
1. Comment, review, or take action on a file.
2. Upload a new version of a file.
3. Create a new file.
## Sync States
 Every file has a sync state in Mudstack. The sync state will tell you where the file is stored, and if there is an issue that needs to be resolved.
* **Local** - File only exists locally, and can be pushed to the cloud
* **Cloud** - File only exists in the cloud workspace, and can be pulled (downloaded) from the cloud
* **Synced** - File exists in the cloud workspace, is mapped to your local directory and in sync
* **Local Changes** - A previously synced file that now has local changes, and can be pushed to the cloud workspace
* **Conflict** - A previously synced file has local changes but is out of sync with the cloud because another user has pushed their changes to the cloud. Your changes aren't based off of the latest cloud version.
This state updates after a [push](/features/push), [pull](/features/pulling-and-syncing), or [fetch](/features/fetch), while local changes reflect instantly.
If you make any changes you would like to quickly send up to the cloud, you
can [quick push data](/features/push). You can also sync files quickly to disk
with [quick pull](/features/pulling-and-syncing).
## Delete Files and Folders
Deleting of cloud content is a 2 step process in Mudstack, similar to that on your OS. The first step sends the selection to the Trash. To permanently delete files from the Trash, you can empty the Trash.
### Moving Files to Trash
To send files/folders to the Trash:
1. Right-click and select `Send to Trash`, or
2. Use the `Trash` icon in the top actions bar when you have one or more items selected.
Deleting a file or folders from the desktop app will show as local changes. You must push the changes in order for you to move these files and folders to the trash for everyone else.
### Emptying Trash
Once files are in the Trash, if you want to permanently delete them, you can do so from within the Trash. To get to the Trash, click on the Filters icon in Search and select `Go To Trash`.
Here you can either selectively empty the trash of files or restore them to their original locations, or permanently delete them by emptying the trash.
Permanent delete actions will also need to be pushed to the cloud for the changes to affect everyone else.
### Deleting via Your OS
If you delete files or folders from a local directory that's mapped to a cloud workspace using your Windows Explorer or Mac Finder, Mudstack will assume by default that this was an error, and show the file or folder as missing.
If this was an error, you can right click and `Restore` the missing file/folder. This will place the file back in its original location but it will not appear on your disk unless you re-enable syncing for the file.
If this was not an error, you can select `Remove`. Files removed this way will be sent to the trash.
## Multi Select
To select multiple files, hold `Shift` or `Control` and click on each file that you want to select.
Every file has a sync state in Mudstack. The sync state will tell you where the file is stored, and if there is an issue that needs to be resolved.
* **Local** - File only exists locally, and can be pushed to the cloud
* **Cloud** - File only exists in the cloud workspace, and can be pulled (downloaded) from the cloud
* **Synced** - File exists in the cloud workspace, is mapped to your local directory and in sync
* **Local Changes** - A previously synced file that now has local changes, and can be pushed to the cloud workspace
* **Conflict** - A previously synced file has local changes but is out of sync with the cloud because another user has pushed their changes to the cloud. Your changes aren't based off of the latest cloud version.
This state updates after a [push](/features/push), [pull](/features/pulling-and-syncing), or [fetch](/features/fetch), while local changes reflect instantly.
If you make any changes you would like to quickly send up to the cloud, you
can [quick push data](/features/push). You can also sync files quickly to disk
with [quick pull](/features/pulling-and-syncing).
## Delete Files and Folders
Deleting of cloud content is a 2 step process in Mudstack, similar to that on your OS. The first step sends the selection to the Trash. To permanently delete files from the Trash, you can empty the Trash.
### Moving Files to Trash
To send files/folders to the Trash:
1. Right-click and select `Send to Trash`, or
2. Use the `Trash` icon in the top actions bar when you have one or more items selected.
Deleting a file or folders from the desktop app will show as local changes. You must push the changes in order for you to move these files and folders to the trash for everyone else.
### Emptying Trash
Once files are in the Trash, if you want to permanently delete them, you can do so from within the Trash. To get to the Trash, click on the Filters icon in Search and select `Go To Trash`.
Here you can either selectively empty the trash of files or restore them to their original locations, or permanently delete them by emptying the trash.
Permanent delete actions will also need to be pushed to the cloud for the changes to affect everyone else.
### Deleting via Your OS
If you delete files or folders from a local directory that's mapped to a cloud workspace using your Windows Explorer or Mac Finder, Mudstack will assume by default that this was an error, and show the file or folder as missing.
If this was an error, you can right click and `Restore` the missing file/folder. This will place the file back in its original location but it will not appear on your disk unless you re-enable syncing for the file.
If this was not an error, you can select `Remove`. Files removed this way will be sent to the trash.
## Multi Select
To select multiple files, hold `Shift` or `Control` and click on each file that you want to select.