- Pulling & Syncing data from the cloud to your local computer, and auto syncing files and folders, so that you’re in sync with cloud data.
- Pushing changes from your computer up to the cloud, so cloud data can stay in sync with your changes.
How Local and Cloud Workspaces Interact

- Cloud only workspace: this is a workspace that is not mapped to a local directory for the user. Indicated by a “Map workspace” banner in the Files view.
- Mapped workspace: this is a workspace that exists both locally and in the cloud, and can be kept in sync.
The following data changes are immediate and will not show in the Sync
Table: Comments, Tasks, Reviews, File Activity, User management and
Attachments.
Mapping a Workspace
In order to synchronize data between a cloud workspace and your computer, you must first connect, ormap the cloud workspace to a designated location on your computer.
The workspace sidebar will also show a button alongside workspaces that haven’t been mapped yet— whether they are local only or cloud only.
Map an Existing Cloud Workspace
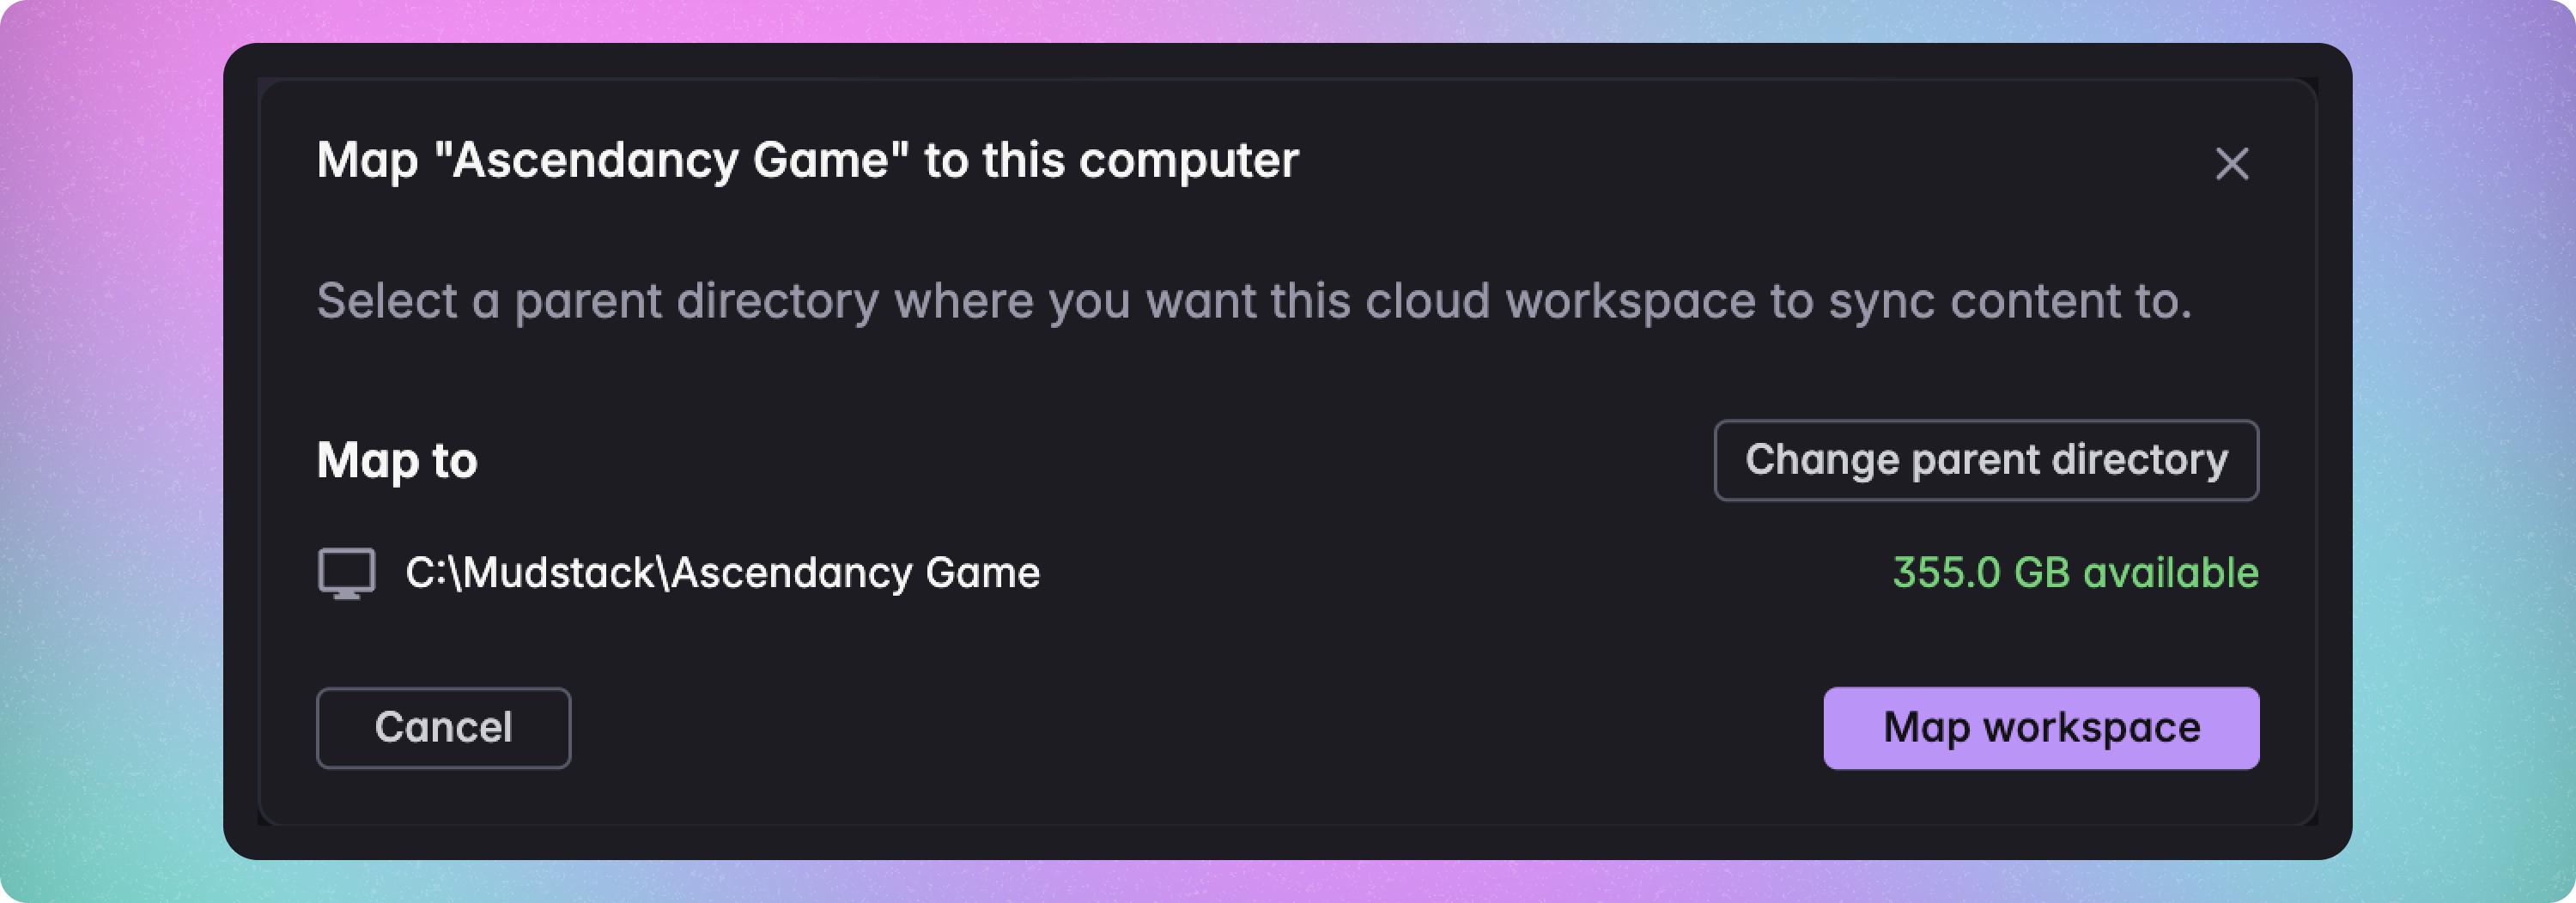
Map workspace button in the Files view on your desktop app.
You will see a modal appear. Click Select Workspace Location to choose the parent folder of the location where you want to create the local directory for the workspace.
Unmap a Workspace
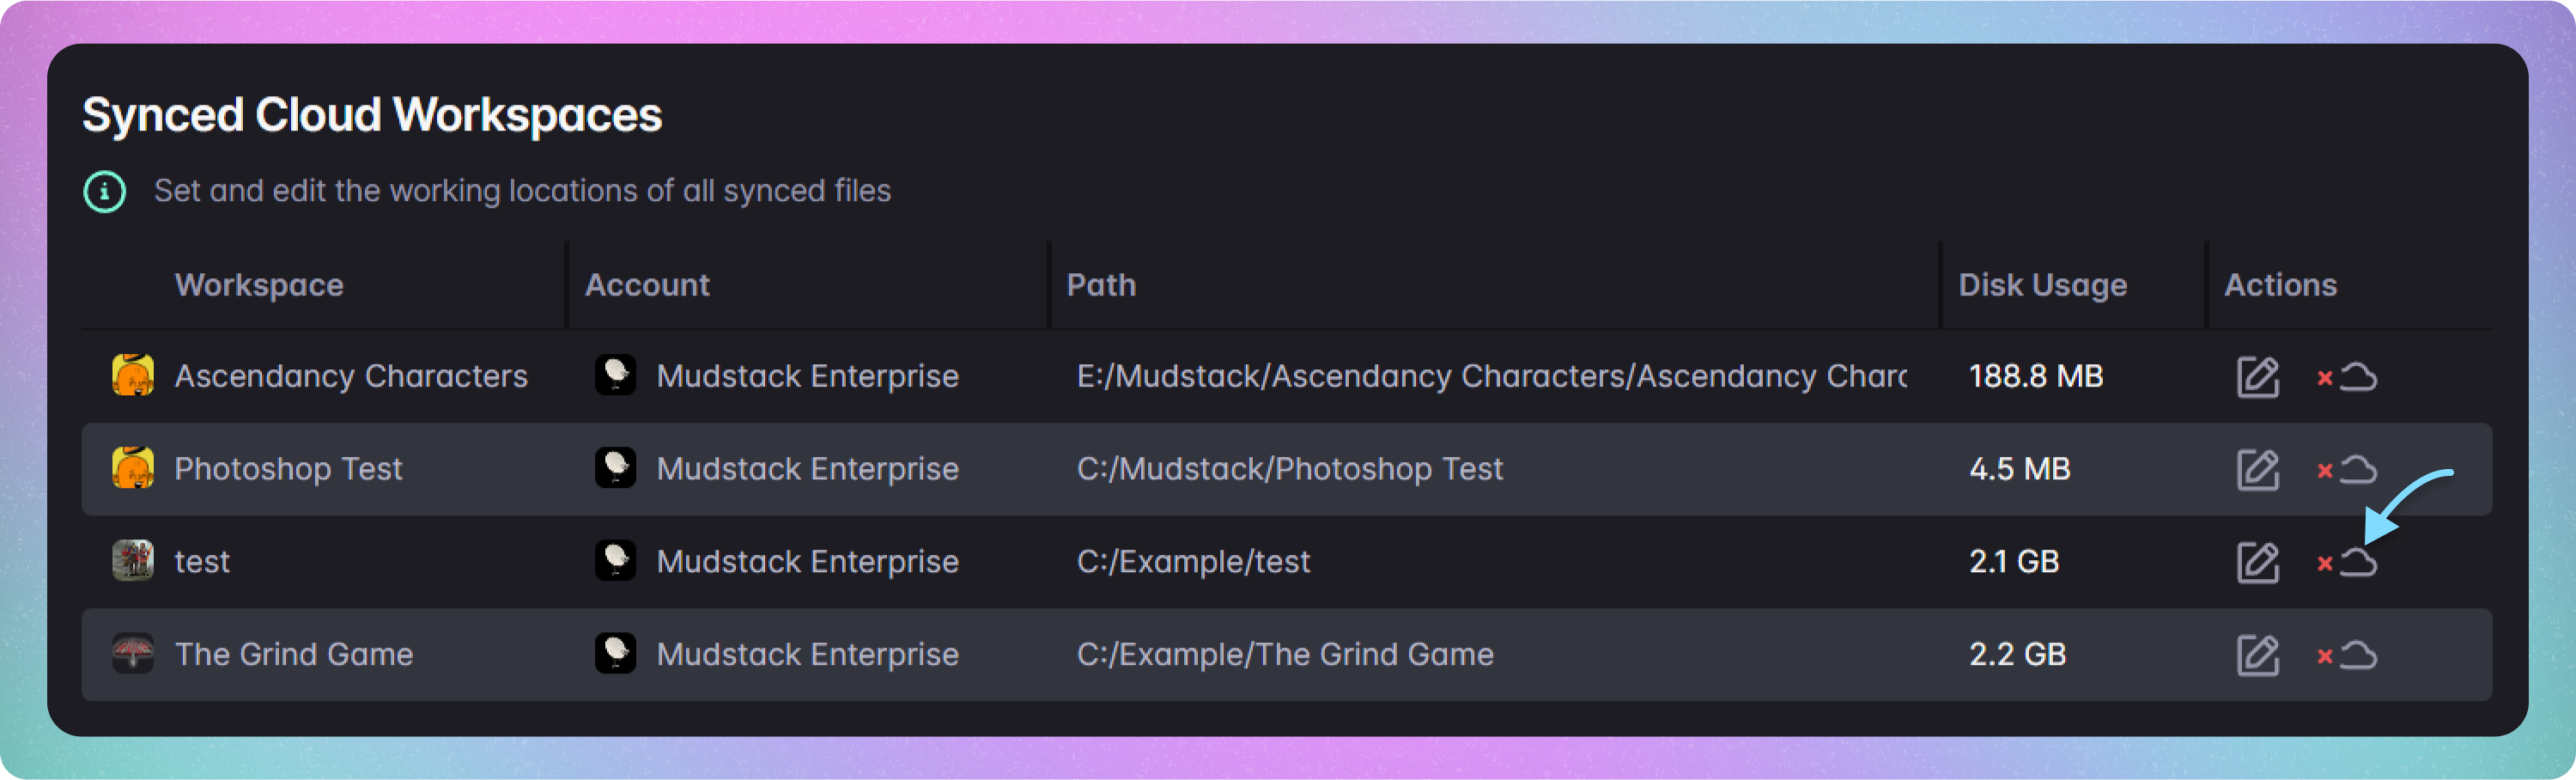
Settings > App Settings > Cloud Workspaces. From here you can click the Unsync icon for a synced workspace and confirm that you want to stop syncing.
Any files that are already synced will remain but Mudstack will stop watching this directory for changes or creating new local versions for files in this directory.
Data vs. File Syncing
When Mudstackpulls changes, it is:
- Pulling updates made by others to metadata for the selected workspace— its libraries, tags, and files (names, locations and any changes to the current version).
- Downloading only the files (and folders) that you have enabled auto syncing on.